Wireshark | The Ultimate Network Protocol Analyzer for Beginners
Wireshark is a powerful, open-source network protocol analyzer used for network troubleshooting, security analysis, and learning. This blog provides a step-by-step guide to installing and using Wireshark, from setting it up to capturing and analyzing network traffic. It covers essential features such as filters, packet details, color coding, statistics, and decryption. Additionally, the blog highlights best practices, including capturing only relevant traffic and respecting privacy. Wireshark is an invaluable tool for anyone looking to deepen their understanding of network communications and enhance their security expertise.

Wireshark is one of the most powerful and widely-used network protocol analyzers. It’s free, open-source, and invaluable for network troubleshooting, learning, and security analysis. Whether you’re just starting or looking to improve your skills, this blog will guide you through the basics of Wireshark in a simple, step-by-step manner.
What is Wireshark?
Wireshark captures network packets in real-time and displays them in a human-readable format. It helps network professionals analyze traffic, identify issues, and understand how devices communicate.
How to Install Wireshark
-
Download Wireshark: Visit the Wireshark website and download the installer for your operating system (Windows, macOS, or Linux).
-
Install the software: Follow the on-screen instructions during installation. On Windows, you may need to install "Npcap" (a packet capture library).
-
Launch Wireshark: Open the application after installation.
Step-by-Step Guide to Using Wireshark
Step 1: Launch Wireshark with Root Privileges
-
Open the terminal in Kali Linux.
-
Type
sudo wiresharkto launch Wireshark with root privileges, allowing it to access network interfaces for packet capturing.
Step 2: Choose the Network Interface
When you launch Wireshark, you’ll see a list of available network interfaces (e.g., Wi-Fi, Ethernet). Select the interface you want to capture packets from. Usually, you’ll pick the one connected to the internet.
-
Tip: The interface with the most traffic (measured in packets) is often your active network.
-
Click the blue "shark fin" icon or double-click the desired interface to start capturing packets.

Step 3: Start Capturing Packets
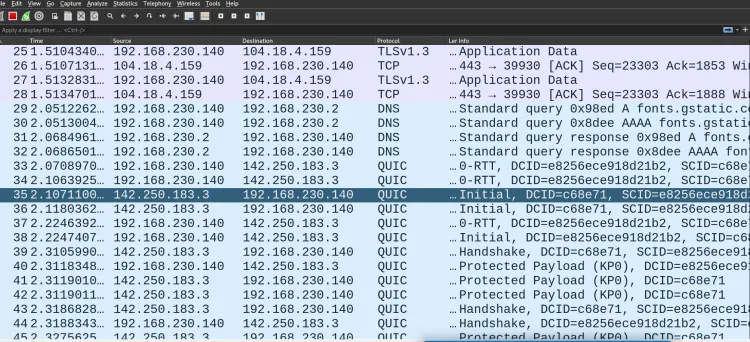
Once you start capturing, Wireshark will display a live list of network packets. Each packet is represented as a row with columns like:
-
No.: Packet number.
-
Time: Timestamp of when the packet was captured.
-
Source: The origin IP address.
-
Destination: The target IP address.
-
Protocol: The protocol used (e.g., HTTP, TCP, UDP).
-
Length: Size of the packet.
-
Info: Additional details about the packet.
Step 4: Stop Capturing Packets
When you have enough data, click the red square icon to stop capturing.
Step 5: Apply Display Filters
Now comes the fun part: analyzing the captured data.
-
Filters:
Use the filter bar at the top to narrow down your data. For example:
-
Use ip.addr == 192.168.1.1to filter packets involving a specific IP address.
-
Use tcp.port == 80to filter traffic on port 80.
-
-
Press Enter to apply the filter.
-
- Apply the HTTP Filter:

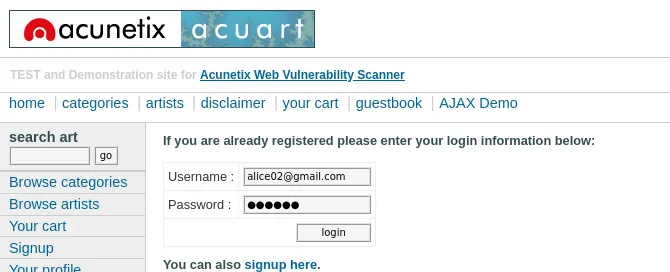
Step 6: Locate Login Traffic
-
Look for packets with the POST method. POST requests are commonly used when submitting login credentials.
- In the "Info" column, you may see entries like
POST /loginorPOST /authenticate.
- In the "Info" column, you may see entries like
-
Click on a packet that matches this description.


-
Packet Details:
-
Click on a packet to view its detailed information in the lower pane.
-
The details are structured into layers, such as Ethernet, IP, TCP, and Application protocols.

-
-
Follow Streams:
-
Right-click a packet and choose "Follow" > "TCP Stream" (or another protocol) to see an entire conversation between devices.
-
-
Packet Reassembly:
-
Wireshark can reassemble fragmented packets for better analysis.
-
Step 5: Save and Export Data
To save your capture:
-
Go to File > Save As and choose a location.
-
To export specific packets, use File > Export Specified Packets.
Key Features and Options in Wireshark
1. Display Filters
Filters help you focus on relevant traffic by using keywords or expressions. Common filters include:
-
dnsfor DNS traffic. -
httpfor HTTP requests and responses. -
tcp.analysis.flagsto detect TCP issues.
2. Color Coding
Wireshark uses color codes to highlight different types of traffic:
-
Light blue for DNS traffic.
-
Green for HTTP requests.
-
Black for problematic packets (e.g., errors).
You can customize these colors under View > Coloring Rules.
3. Statistics
Wireshark provides various statistical tools:
-
Protocol Hierarchy: Analyze traffic distribution by protocol.
-
Conversations: View all conversations between devices.
-
I/O Graphs: Visualize traffic over time.
4. Packet Decryption
Wireshark supports decryption for protocols like SSL/TLS. To decrypt:
-
Obtain the encryption keys.
-
Go to Edit > Preferences > Protocols > SSL and add the keys.
5. Packet Comments
You can add comments to specific packets for documentation purposes.
6. Plugins and Extensions
Wireshark supports plugins to enhance functionality. You can install third-party tools for advanced analysis.
Common Use Cases
-
Troubleshooting Network Issues:
-
Identify slow connections, dropped packets, or misconfigured devices.
-
-
Security Analysis:
-
Detect suspicious traffic or potential breaches.
-
-
Learning Networking:
-
Understand how protocols and devices communicate in real-time.
-
Best Practices for Using Wireshark
-
Capture only what you need: Large captures can slow down analysis.
-
Use filters effectively: This saves time and helps you focus.
-
Respect privacy: Avoid capturing sensitive data without permission.
-
Practice offline: Use sample packet captures from Wireshark’s website to learn.
Wireshark is an essential tool for anyone working with networks, from beginners to seasoned professionals. By following this guide and exploring its features, you’ll be able to troubleshoot and analyze network traffic with confidence. Happy packet capturing!
FAQ:
-
What is Wireshark used for?
Wireshark is a network protocol analyzer used to capture and examine the data traveling through a network. It helps in troubleshooting network issues, analyzing traffic for security vulnerabilities, and learning how different network protocols operate. -
How do I install Wireshark on my system?
To install Wireshark, visit the official website and download the installer for your operating system (Windows, macOS, or Linux). Follow the on-screen instructions. On Windows, you may need to install Npcap for packet capturing. Once installed, launch the application to begin using it. -
What are display filters in Wireshark?
Display filters in Wireshark allow you to narrow down captured traffic to only the relevant packets. Filters can be applied based on criteria like IP address, protocol, port number, etc. For example, you can useip.addr == 192.168.1.1to filter traffic involving a specific IP address. -
How can I follow a TCP stream in Wireshark?
To follow a TCP stream in Wireshark, right-click on a packet and select "Follow" > "TCP Stream" from the context menu. This will show the entire conversation between the sender and receiver for that specific stream. -
Can Wireshark decrypt SSL/TLS traffic?
Yes, Wireshark can decrypt SSL/TLS traffic, but you need the necessary encryption keys. You can add these keys in Wireshark's preferences under Edit > Preferences > Protocols > SSL to enable decryption. -
How do I save captured packets in Wireshark?
To save captured packets, go to the File menu and select "Save As". Choose the location and file format (such as .pcap or .pcapng). You can also export specific packets using "Export Specified Packets" for more targeted analysis. -
What is the significance of color coding in Wireshark?
Color coding in Wireshark is used to visually distinguish different types of traffic. For example, DNS traffic is colored light blue, HTTP requests are green, and problematic packets may appear in black. This helps in quickly identifying traffic and potential issues. -
Can Wireshark help with network security analysis?
Yes, Wireshark is a valuable tool for network security analysis. It can detect suspicious traffic, potential breaches, and malicious activities by allowing you to inspect raw network data. You can analyze protocols for weaknesses, such as unencrypted sensitive information being transmitted. -
How do I capture packets on a specific interface in Wireshark?
To capture packets on a specific interface, launch Wireshark and select the desired network interface (Wi-Fi, Ethernet, etc.) from the list of available interfaces. The interface with the most traffic is often the active network connection. -
What are the best practices for using Wireshark effectively?
Some best practices for using Wireshark include:
- Capture only the necessary traffic to avoid overwhelming your system.
- Use filters to narrow down and focus on specific traffic.
- Avoid capturing sensitive data without permission.
- Practice offline using sample packet captures available on Wireshark’s website to improve your skills.


![Top 10 Ethical Hackers in the World [2025]](https://www.webasha.com/blog/uploads/images/202408/image_100x75_66c2f983c207b.webp)


![[2025] Top 100+ VAPT Interview Questions and Answers](https://www.webasha.com/blog/uploads/images/image_100x75_6512b1e4b64f7.jpg)


